My kitchen drawer used to be a confidence-draining experience. Every morning I reached in for a spatula and came up with a corn cob holder, two mismatched straws, and a bread tie. I am renting a 1-bedroom apartment with exactly four kitchen drawers, and until I spent a single Sunday afternoon with a Lifewit Expandable Silverware Organizer, all four were essentially junk drawers. The Lifewit tray has 30,000-plus Amazon reviews for a reason. It costs under ten dollars, adjusts from about 11 inches to 17 inches wide, fits most standard rental drawers without modification, and is BPA-free plastic that wipes clean in 30 seconds. If you have a drawer problem, this is the tool that solves it.
This guide walks through the exact process I use: pull everything out, sort it ruthlessly, measure the drawer, drop the tray in, and load it back up with intention. Five steps. You can finish the whole kitchen in a single afternoon. I will also cover which drawers to tackle first, what to do with the stuff that does not belong in the kitchen at all, and a few supporting tools that help the system hold over time.
Before you start: grab the tray that makes this whole system work.
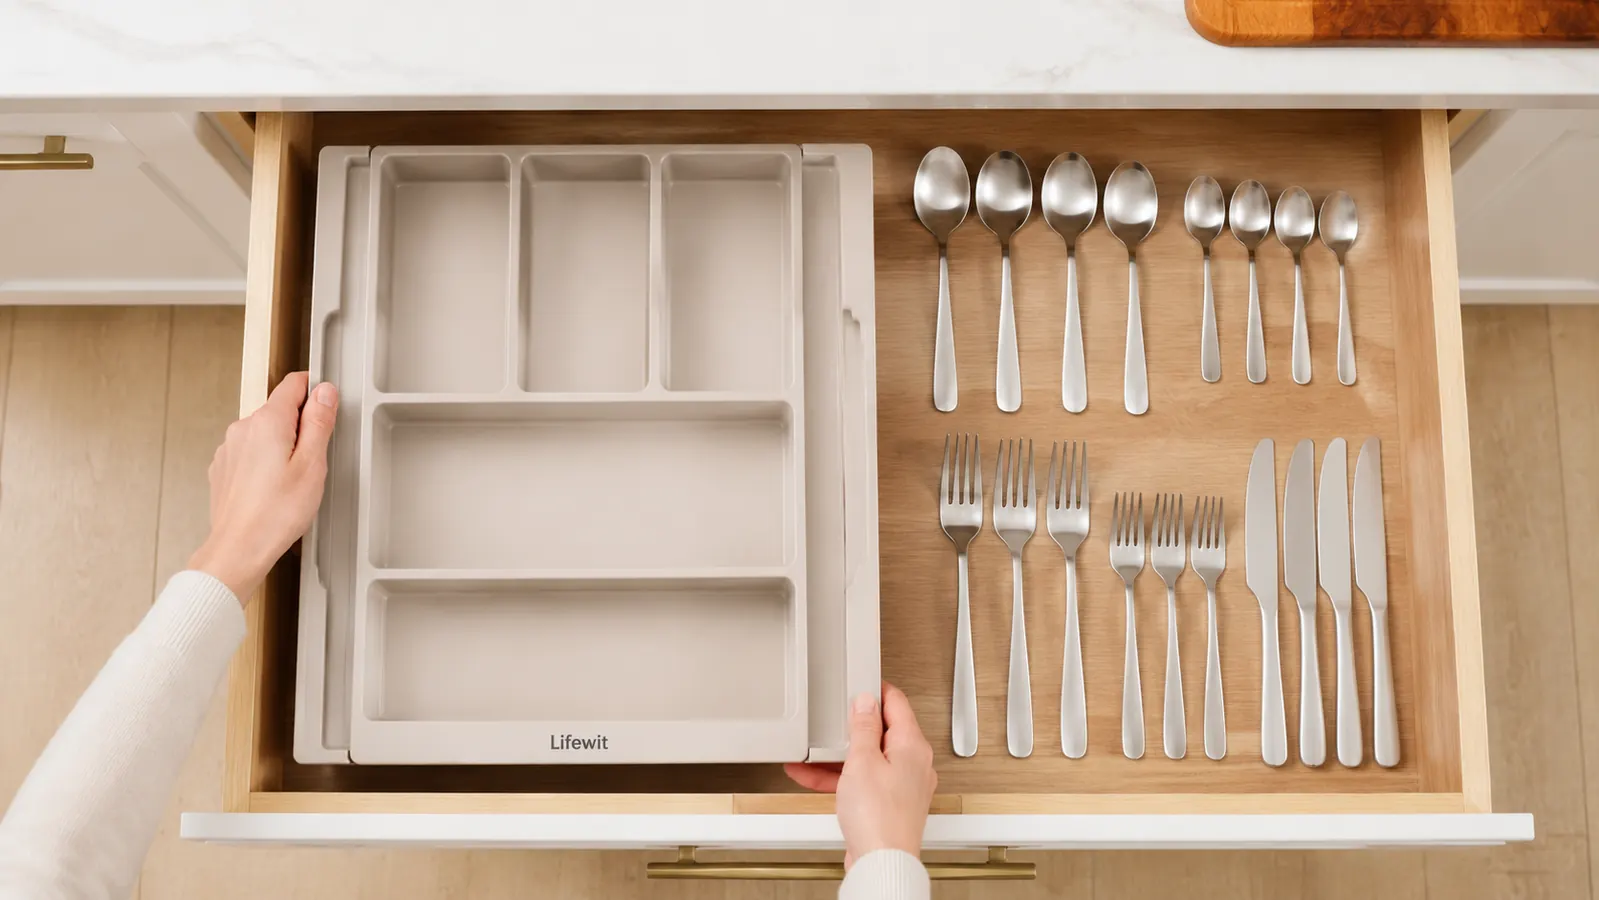
The Lifewit Expandable Silverware Organizer adjusts from 11 to 17 inches wide to fit most kitchen drawers. Under $10, BPA-free, and it takes about 90 seconds to install. Grab it before you start so you can fit the tray while the drawer is empty.
Amazon Check Today's Price on Amazon →Step 1: Pull Every Drawer Completely Out and Empty It on the Counter
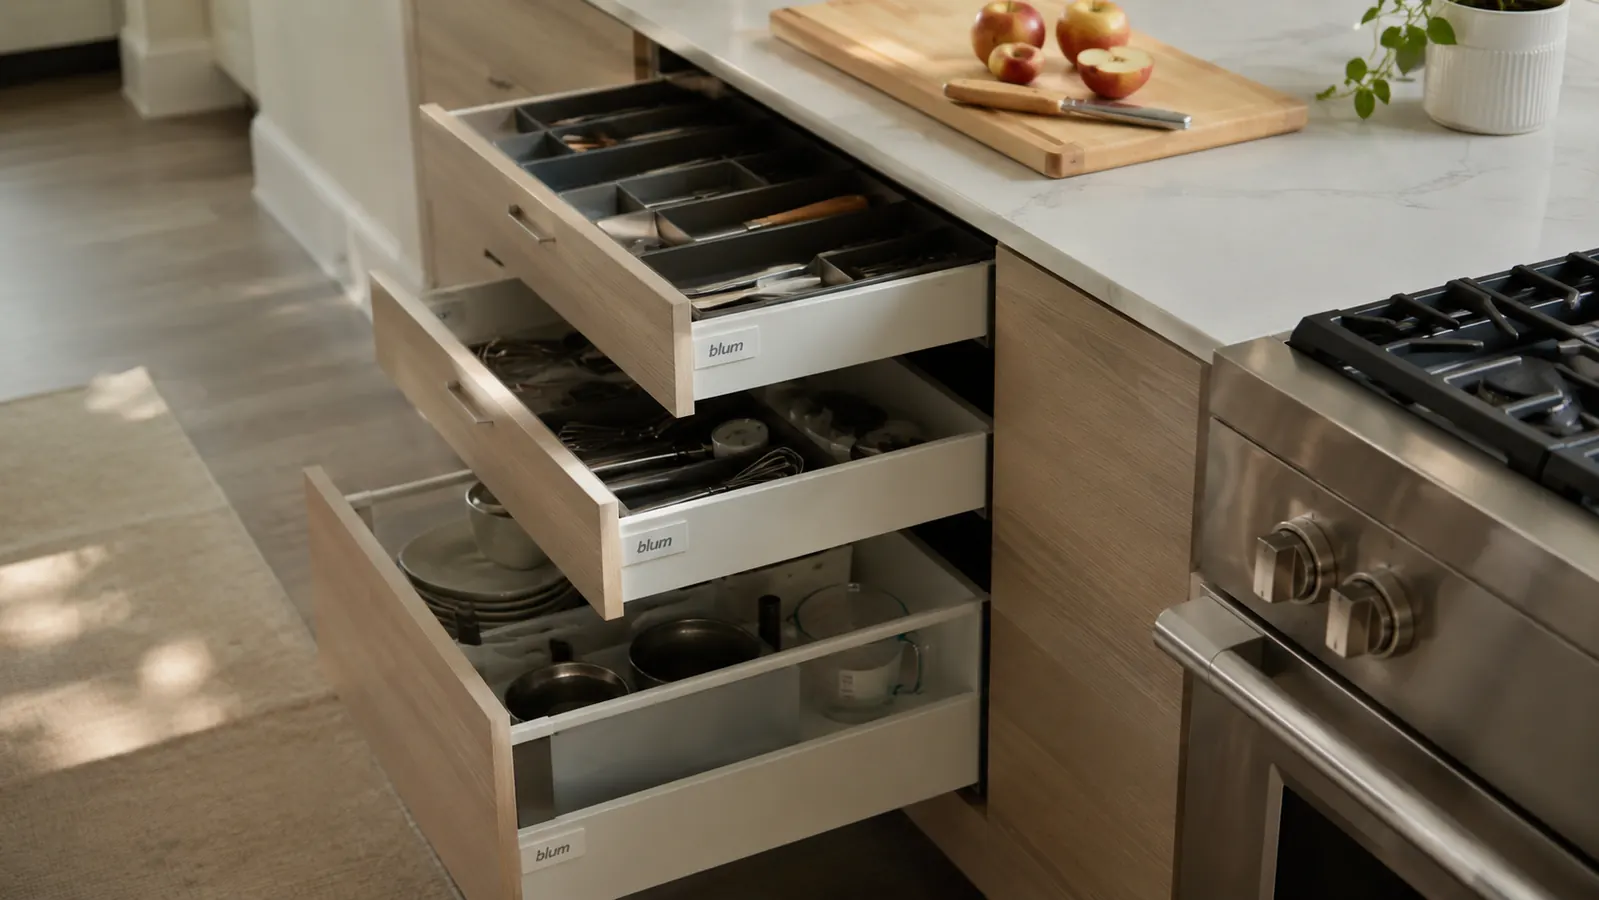
Do not try to sort a drawer while it is still in the cabinet. You cannot see what is in the back, you cannot measure the actual interior dimensions accurately, and you will spend twice as long. Pull the drawer all the way out. Most rental kitchen drawers lift straight up and out once they are fully extended. If yours has a stop catch, press it down while pulling. Set the drawer on the counter and dump the contents into a pile next to it.
Now measure the drawer interior. Write down the width and the depth. Do this for every drawer you plan to organize before you buy anything. The Lifewit tray spans 11 to 17 inches wide, which covers most standard drawer widths in apartments and rental homes. The depth of the tray is about 9.5 inches, so if your drawer is shallower than 9 inches you will need to look at a smaller option. Most kitchen drawers I have seen in rentals are 12 to 15 inches wide and 18 to 20 inches deep front-to-back, which means one tray fits fine near the front and leaves usable space at the back for bulkier items.
While the drawer is out, wipe it down. Drawer bottoms collect crumbs, grease residue, and mystery grit at an alarming rate. A damp paper towel takes 30 seconds and means your new tray sits on a clean surface from day one.
Step 2: Sort the Pile Into Three Categories Before Anything Goes Back
Here is where most people stall. They pull the stuff out, feel overwhelmed, and start loading things back in without actually making a decision. The trick is three piles, not one. Pile one is Keep Here, meaning it genuinely belongs in this specific drawer. Pile two is Keep But Move, meaning you actually use it but it belongs somewhere else in the kitchen. Pile three is Donate or Toss, meaning you have not used it in the past six months, it is broken, or you own four of it.
For the silverware drawer, Keep Here is obvious: everyday forks, spoons, knives, and maybe a couple of serving spoons. The three extra sets of takeout chopsticks, the steak knife with the wobbly handle, and the slotted spoon from a set you no longer own all belong in pile two or three. For a utensil drawer, Keep Here is limited to tools you reach for at least once a week. If you cannot remember the last time you used the avocado slicer, it goes in pile two or three.
Be blunt with yourself here. A cluttered drawer is not a storage problem, it is a decision-deferral problem. Every item in that pile that you send back into the drawer without a good reason is future friction.
Step 3: Install the Expandable Tray and Assign Every Compartment a Category
Grab the Lifewit tray and adjust its width to match your drawer interior. There is a slide mechanism on either end. Extend it until it presses snugly against both side walls. It does not need to be forced; a firm fit is enough to keep it from shifting. Drop it into the drawer near the front. The tray sits about 1.75 inches deep, which fits perfectly under standard drawer fronts without catching.
The tray has five compartments by default: two narrow knife slots on the right, two medium slots for forks and spoons, and one wider slot for serving spoons or larger utensils. Assign each compartment a single category before you put anything in. This sounds fussy but it takes about ten seconds and makes all the difference. If you drop things in without a plan you will recreate the same pile you just cleaned up, just inside smaller sections.
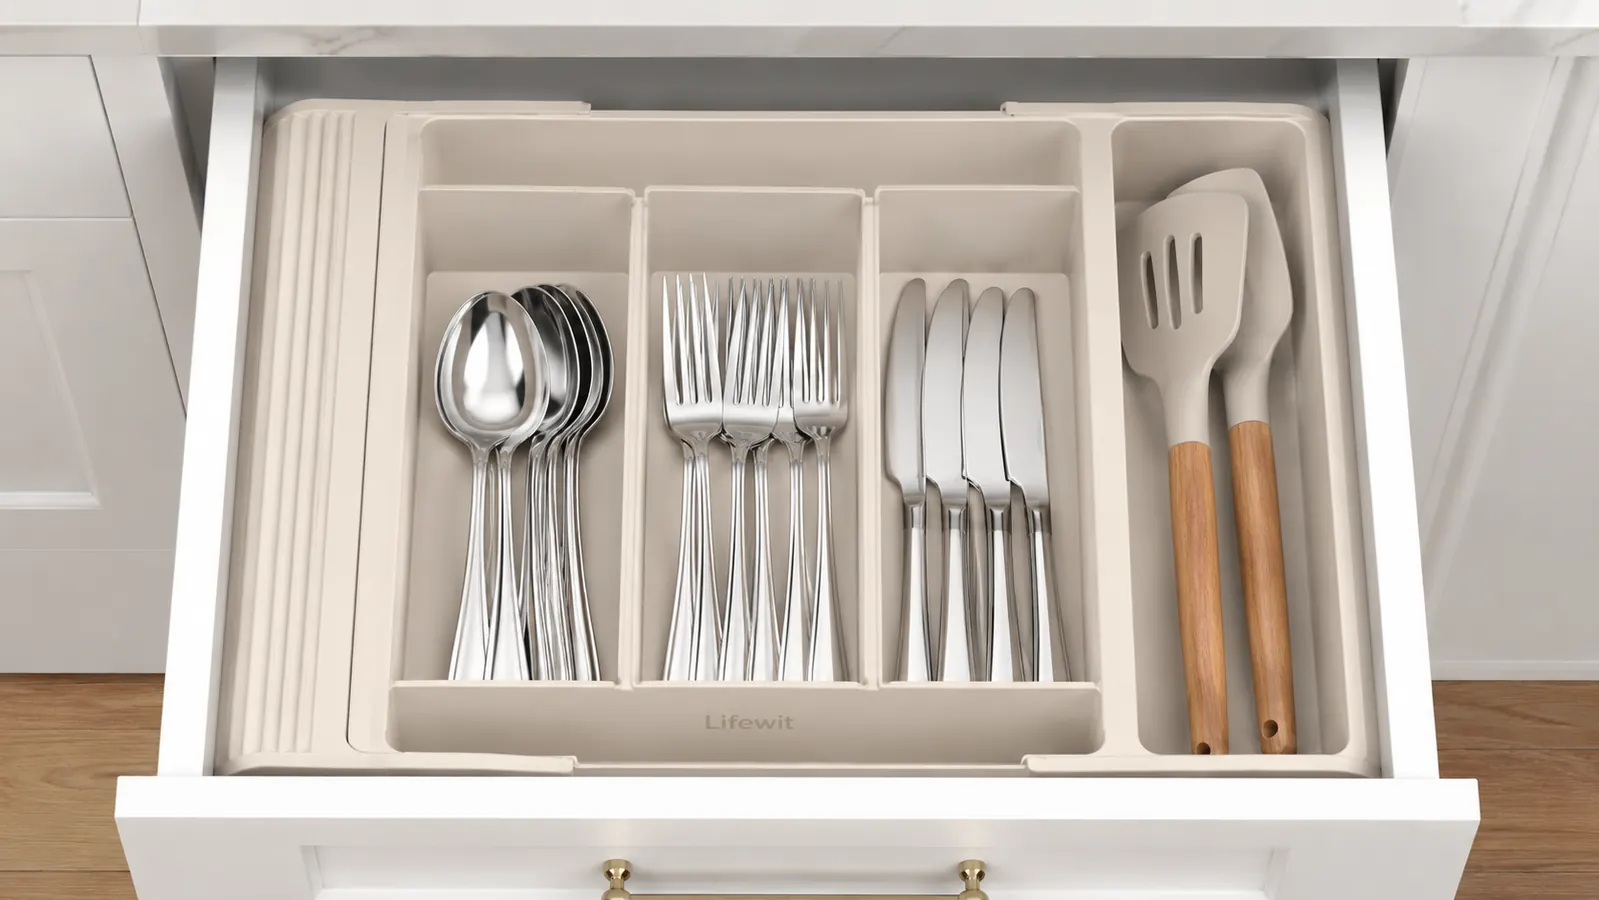
If you are organizing a cooking utensil drawer rather than silverware, the compartment assignments shift. I use one slot for wooden spoons, one for rubber spatulas, one for metal tongs, one for can opener and peeler, and the wide slot for a ladle or whisk. The point is that every item has a home before it goes back in. No more setting something down in the nearest open space.
Step 4: Load the Keep-Here Items First, Then Handle the Back of the Drawer
Load the tray with your Keep Here items. Be deliberate: forks in the fork slot, knives in the knife slot. The tray's compartments are sized for standard flatware, so everyday silverware fits without crowding. If you are loading cooking utensils, nest similar items together. Flat spatulas stack; slotted spoons stack. You want to be able to grab any item without shifting everything around it.
Now look at the space behind the tray. In a standard 18-to-20-inch-deep drawer, you have 8 to 10 inches of open space at the back after the tray is installed. Do not waste it and do not stuff it randomly. This is a good home for items that are used less frequently but still belong in the kitchen: a rolling pin, a box of toothpicks, an extra set of measuring spoons still in the packaging. Keep it to one layer of items and leave each item visible from above. If you cannot see it, you will forget it is there.
The drawer in my kitchen went from something I avoided to something I open 10 times a day without frustration. The tray cost less than a lunch out. That is the whole math on this.

Step 5: Repeat the System for Every Other Kitchen Drawer
One organized drawer is nice. Four organized drawers changes how the kitchen feels. Work through each drawer using the same pull-out, sort, measure, tray, load sequence. Not every drawer needs a Lifewit tray. If a drawer is storing dish towels or pot lids, a tray is not the right tool. But any drawer that stores loose small items, flat utensils, or everyday silverware benefits from one.
In my kitchen I use two Lifewit trays: one in the silverware drawer and one in the main cooking utensil drawer. The other two drawers hold a rubber grip liner for pot lids and a folded dish towel. Total cost for the organizing layer: under $20. Total time: one Sunday afternoon, about three hours including sorting through years of accumulated kitchen clutter.
Maintenance is the step most guides skip. Every three to four months, pull the tray out and wipe it down. Reassess the back-of-drawer zone. If something has lived back there unused for two months, it probably belongs in the Donate pile. The system holds if you do a 10-minute reset occasionally. It collapses if you let the back zone become a second junk drawer.
What Else Helps
The tray handles the physical sorting. A label maker locks in the system long-term, especially in households with more than one person. When everyone who opens that drawer knows where forks live, the drawer stays organized without anyone needing to enforce it. I use the Brother P-Touch PTD220 for this. I printed small labels for the compartment fronts and for the drawer fronts themselves. Takes about 15 minutes for the whole kitchen and means even guests know where to put things back after dinner. For the full walkthrough on setting up a labeling system that covers your whole kitchen, see how a label maker made my pantry finally make sense.
If you want to go deeper on the Lifewit tray itself before buying, including how it holds up after a year of daily use and where its limitations are, the long-term Lifewit drawer organizer review covers everything: durability, compartment sizing for different flatware, and how it compares to bamboo alternatives. The short version: for a rental kitchen where you need something that fits without modification, stays put without adhesives, and costs under $10, nothing touches it.
The tray that started this whole system is still under $10.
The Lifewit Expandable Silverware Organizer adjusts to fit most kitchen drawers and takes about 90 seconds to install. If your drawer situation is causing daily friction, this is the fastest fix you will find.
Amazon Check Today's Price on Amazon →